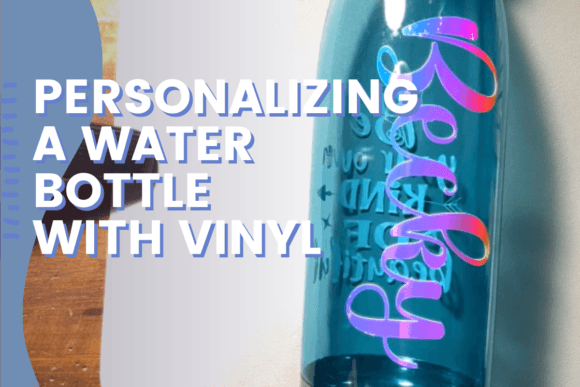
Personalizing a Water Bottle with Vinyl
In a world saturated with mass-produced goods, adding a personal touch to everyday items has become more than just a hobby—it is a statement of individuality. Personalizing a water bottle with vinyl sits at the intersection of practical utility and creative expression. It transforms a standard, functional object into a unique accessory that reflects personality, brand identity, or simply a favorite quote. Whether you are looking for a meaningful gift for a friend, a branded item for your small business, or a way to make your morning hydration routine feel a little more special, this craft offers an accessible entry point into the world of custom design.
The beauty of this project lies in its accessibility. You do not need expensive machinery or years of artistic training to achieve professional-looking results. With the right tools—specifically a cutting machine like Cricut—and some adhesive vinyl, you can create durable, waterproof designs that withstand daily use. This approach allows creators, educators, and hobbyists alike to produce high-quality personalized items without the overhead of industrial printing methods.
Why Choose Vinyl for Customization?
Vinyl is the preferred medium for many crafters because it offers durability, versatility, and ease of application. Unlike paint, which requires drying time and can chip or peel, adhesive vinyl bonds securely to smooth surfaces like stainless steel, plastic, and glass. Once applied correctly, these decals are resistant to water, dishwasher cycles (on the top rack), and general wear and tear.
For entrepreneurs and marketers, vinyl customization provides a cost-effective way to create branded merchandise. Imagine handing out water bottles with your company logo or slogan to clients at a conference. The tactile nature of a physical, personalized item often leaves a stronger impression than digital ads. Similarly, for educators and parents, labeling supplies or creating themed classroom decor becomes significantly easier when you can produce uniform, clean labels quickly.
The Role of Digital Design Tools
The process begins long before the vinyl touches the bottle; it starts on the screen. Modern crafting relies heavily on software that bridges the gap between digital creativity and physical production. Programs like Cricut Design Space allow users to upload images, select fonts, and arrange layouts with precision. This digital workflow ensures that every curve and letter is cut perfectly, eliminating the frustration of freehand errors.
Using pre-made SVG files can streamline this process, especially for beginners. An SVG (Scalable Vector Graphics) file contains the mathematical instructions needed to cut shapes. When you download an SVG file along with the recommended font, you are essentially getting a blueprint for your design. This removes the guesswork from typography and layout, allowing you to focus on color choices and placement. For those who want to dive deeper, learning how to manipulate these elements in software opens up endless possibilities for original creations.
Step-by-Step Approach to Application
Creating a personalized water bottle involves a few key steps that require patience and attention to detail. While the technology does the heavy lifting of cutting, the human element is crucial in preparation and application.
- Surface Preparation: The most critical step is ensuring the bottle is completely clean. Any dust, oil, or residue will prevent the vinyl from adhering properly. Use rubbing alcohol and a lint-free cloth to wipe down the area where the design will go. Let it dry completely.
- Weeding the Vinyl: After cutting, you must remove the excess vinyl around your design. This process, known as "weeding," requires a sharp tool and a steady hand. Clean weeding ensures that only the intended design remains on the transfer tape.
- Application: Using transfer tape, lift the design and position it on the bottle. Start from one edge and slowly press down, smoothing out any air bubbles as you go. A squeegee or a credit card can help apply even pressure.
- Finishing Touches: Once the vinyl is applied, remove the transfer tape slowly. If any edges lift, press them down firmly. Allow the vinyl to set for 24 hours before washing or exposing it to extreme temperatures for the best longevity.
Creative Variations and Use Cases
While a simple name or quote is a classic choice, the scope of what you can create is vast. Consider the audience you are designing for. For fitness enthusiasts, bold motivational phrases or workout tracking grids printed on vinyl stickers can add value to their gear. For students, combining names with colorful geometric patterns or popular culture references makes school supplies feel uniquely theirs.
Small business owners can explore thematic consistency. If you sell handmade soaps, using the same vinyl pattern on your product labels and promotional water bottles creates a cohesive brand experience. Educators might create sets of labels for student cubbies or library books, using clear, readable fonts and bright colors to aid organization.
Seasonal themes also offer great inspiration. Holiday-specific designs, such as monogrammed bottles for Christmas gifts or sunflower motifs for summer, allow you to keep your projects relevant and timely. The ability to switch designs easily means you are not limited to a single aesthetic; you can adapt your creations to fit current trends or personal moods.
Technical Tips for Success
To ensure your projects look professional, consider the following technical adjustments:
- Font Legibility: Avoid overly script-like fonts if the design is small. Text needs to be readable from a distance. Test your designs by scaling them down on your screen to simulate the final size.
- Contrast Matters: Ensure there is enough contrast between the vinyl color and the bottle color. Light vinyl on a white bottle may get lost, while dark vinyl on black metal provides striking visibility.
- Curvature Challenges: Applying flat vinyl to a curved surface can cause wrinkling. For complex curves, consider using thinner vinyl materials or applying the design in smaller segments rather than one large piece.
Making It Your Own
The true value of personalizing a water bottle with vinyl comes from the intention behind it. It is not just about covering a surface; it is about communicating something specific. Perhaps it is a reminder to stay hydrated, a tribute to a loved one, or a showcase of your own design skills. By mastering the basics of vinyl application and leveraging digital design tools, you gain the freedom to experiment.
As you become more comfortable, you might start mixing media. Combine vinyl with embroidery patches, resin coatings, or even hand-painted accents for mixed-media effects. The initial project serves as a foundation, but the skills you learn—precision, planning, and problem-solving—are transferable to countless other crafting endeavors. Whether you are a seasoned designer looking for quick side-hustle ideas or a beginner seeking a rewarding weekend activity, this craft offers a tangible result that brings satisfaction and pride. Embrace the process, trust your design instincts, and enjoy the journey of turning ordinary objects into extraordinary keepsakes.